Introduction
We have used Cordova + Ionic in the past to quickly prototype mobile apps for clients. Its proved to be a valuable tool because it allows us to re-use existing HTML, CSS and JavaScript we may have from a web project and compile it directly to iOS, Android and other native platforms.
With the release of the Apple Watch, we were curious to see if there was a way to quickly prototype apps for the watch, using Cordova. It turns out you can, with the help of Cordova Apple Watch from Telerik.
This is part of a 2 part post series. Between our two posts, we are going to build a simple navigation app for the iPhone and Watch, which work harmoniously together. In this first post we are working on just the iPhone app, which will allow users to search for an address, which is validated via Google Maps and initialize direction data.
Set up Cordova + Xcode + Apple Watch Plugin
First, lets create a new Cordova project. Be sure to have Ionic CLI tools installed on your machine. We will need to install the xcode package from npm - the plugin hook will need it to inject code into the Cordova project.
$ ionic start locator blank
$ cd locator
$ npm install xcode
$ ionic platform rm ios
As of this post, the latest version available is Cordova iOS v4.1.0. However, the Apple Watch plugin from Telerik is not yet compatible with Cordova iOS 4+, so we will need to install Cordova iOS 3.9.2 to get it working.
Before installing the iOS platform, open locator/config.xml and add your app ID - mine is co.kettleio.demo.locator. Your config.xml should look something like this:
<?xml version="1.0" encoding="UTF-8" standalone="yes"?>
<widget id="co.kettleio.demo.locator" version="0.0.1" xmlns="http://www.w3.org/ns/widgets" xmlns:cdv="http://cordova.apache.org/ns/1.0">
  <name>locator</name>
  <description>
        An Ionic Framework and Cordova project.
    </description>
  <author email="[email protected]" href="http://example.com.com/">
      Your Name Here
    </author>
  <content src="index.html"/>
  <access origin="*"/>
  <preference name="webviewbounce" value="false"/>
  <preference name="UIWebViewBounce" value="false"/>
  <preference name="DisallowOverscroll" value="true"/>
  <preference name="SplashScreenDelay" value="2000"/>
  <preference name="FadeSplashScreenDuration" value="2000"/>
  <preference name="android-minSdkVersion" value="16"/>
  <preference name="BackupWebStorage" value="none"/>
  <feature name="StatusBar">
    <param name="ios-package" value="CDVStatusBar" onload="true"/>
  </feature>
</widget>
Next, lets add the iOS platform to the project by running the following command:
$ ionic platform add [email protected]
With most of the preliminary work out of the way, we can begin working directly on the Xcode project. Open up the Xcode project, which is located in platforms/ios and make the following updates:
- Go to File > New > Target > watchOS > Application > Watchkit App for watchOS 1
- Select Objective-C as the language.
- Check the boxes for Glance and Notifications
- Click on Finish and then click on Activate
Now let's switch back to the terminal and install the Telerik plugin:
$ ionic plugin add https://github.com/Telerik-Verified-Plugins/AppleWatch
If the plugin was installed correctly you will see an Apple Watch drawn with ASCII and a few other messages indicating header files were properly installed.
Configure Xcode
There are a few more steps necessary to build the project correctly.
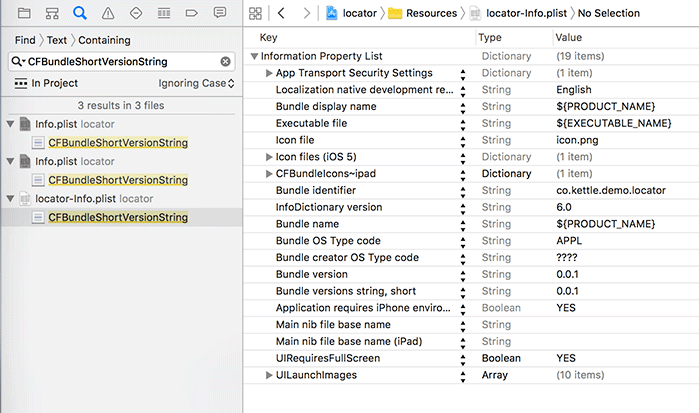
Bundle Version
Set CFBundleVersion (bundle version) and CFBundleShortVersionString (bundle versions string, short) of all targets to the same value. To do this, use XCode's search feature COMMAND + SHIFT + F and change all 3 .plist values. This value must match your config.xml file, so in this example I'm setting the version to 0.0.1.
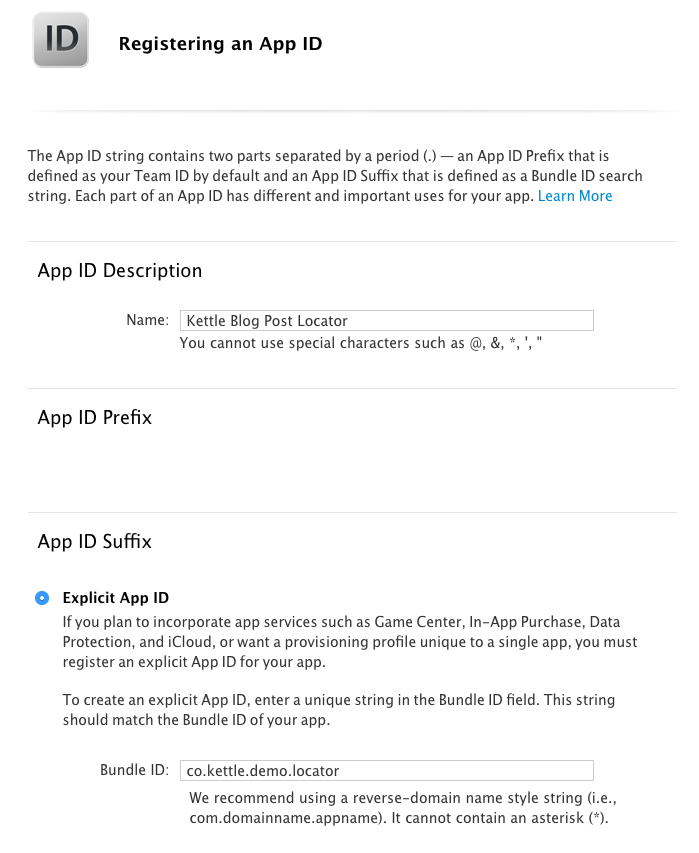
Register App ID
Register the app ID in your Apple Developer Account: Certificates, Identifiers & Profiles > App ID's > New.
Ensure this app ID matches the one we set inside config.xml earlier. You will also need to select App Groups in the enabled services section at the bottom.
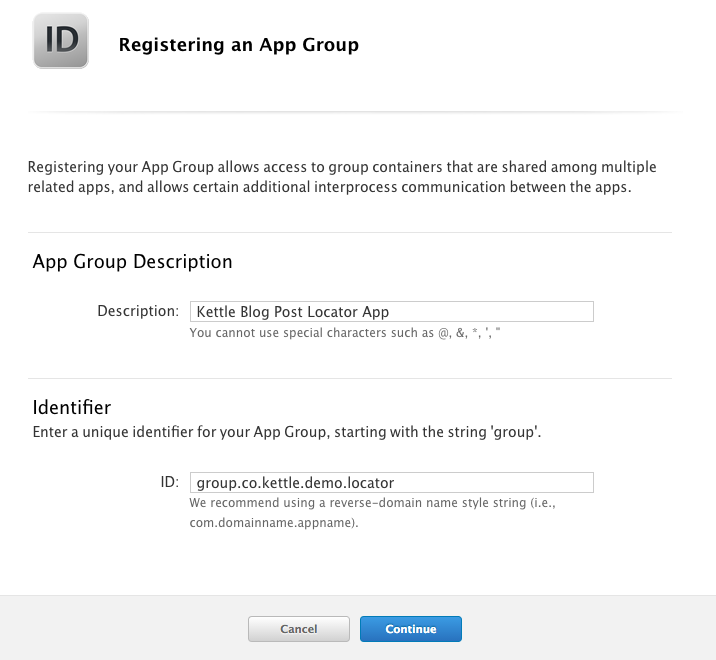
Register App Group
We need to register an App Group in our Apple Developer Account. From the dashboard go to Certificates, Identifiers & Profiles > Identifiers > App Groups > Add New.
Create + Assign Provisioning Profile
- Go to Provisioning Profiles > Development and create a new profile for iOS App Development.
- Download the new profile and open it in Xcode.
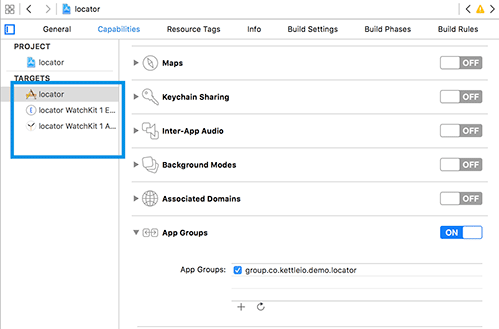
- Go to the targets (Capabilities tab) and add the newly created app group to your target.
- Navigate to the
Build settingstab and search for Bitcode. We will disable it by toggling the option to NO. - Repeat steps 3-4 for all three targets:
Note re: -lmmwormhole
Some users have experienced this error:
ld: library not found for -lmmwormhole
You can fix this by searching the Frameworks directory within Xcode for "libmmwormhole.a". There will be an option for Target Membership on the right sidebar of Xcode.
Deselect both targets, select them again, clean up the project ( Product > Clean) and then build the project again. This has seemingly fixed the linking issue.
Create Routes, Controllers & Views
Now that we have a baseline up and running, lets recap the project goals:
- Create a view that will allow us to search for a valid location within our iOS app.
- Create a view that will show us the compass and destination data. This data/view will eventually be passed to the watch.
This means we need to create two distinct views within our app: map and compass. Before we start building them, we are going to install 2 plugins. They will help us quickly build out the compass functionality:
$ ionic plugin add cordova-plugin-device-orientation
$ ionic plugin add cordova-plugin-geolocation
Setup the Map
We will start by creating a route and controller for the map. Open up your www/js/app.js file and add the following route:
.config(function($stateProvider, $urlRouterProvider) {

  $urlRouterProvider.otherwise('/')

  $stateProvider
  .state('index', {
    url: '/',
    templateUrl: 'map.html',
    controller: 'mapCtrl'
  })

})
Next, with the help of the Google Maps API, we are going to build the controller for our map view. The code we are going to modify can be found on Google's developer site.
With a few tweaks, our map view controller will look like this gist. This code should go after your routes.
Some important notes about this block of code:
- The controller starts with
$scope.ifValidAddress = false- this will allow us to keep the compass hidden, until we find a valid location on the map. - The
$scope.disableTapfunction is responsible for the Google Maps autocomplete. - We created a Factory to save the search location. This will allow us to share the location information between views.
Map View
The map view will simply have a fullscreen Google Map with a text input for location searching. We will connect the search to the Google Places API for suggestions. Open the index.html file and include the Google Maps API & Google Places libraries:
<script src="https://maps.googleapis.com/maps/api/js?key=YOUR_API_KEY&libraries=places" async defer></script>
Note, you will need to add your own API Key from the Google Maps API.
You will also need to update the <body> of your index.html file so it looks like this:
<body ng-app="starter">

 <ion-nav-bar class="bar-positive">
   <ion-nav-back-button>
   </ion-nav-back-button>
 </ion-nav-bar>
 <ion-nav-view></ion-nav-view>

</body>
Next, we are going to create a new file in the www directory called map.html and add our map view to it. The view will look like this:
<ion-view view-title="Map">

   <ion-nav-buttons side="right">
      <button class="button icon-right ion-compass button-clear" ng-click="openCompass()" ng-show="ifValidAddress"></button>
   </ion-nav-buttons>
    <ion-content scroll="false" >

      <input id="search-place" class="controls" type="text" placeholder="Search Address" ng-focus="disableTap()">
      <div id="map"></div>

    </ion-content>

</ion-view>
This view accomplishes a few things for us:
- We are going to conditionally show the compass button if a valid location is found. We are using the
ng-show="ifValidAddress"function for this. - We added an input with
id="search-place". We'll use this data input to query the Google Places library. - We added a div
id="map"to insert the Google map.
Map Styles
Now lets make it sexy with some CSS. Place the following code inside www/css/style.css:
#map {
    height: 100%;
}

.controls {
    margin-top: 10px;
    border: 1px solid transparent;
    border-radius: 2px 0 0 2px;
    box-sizing: border-box;
    -moz-box-sizing: border-box;
    height: 32px;
    outline: none;
    box-shadow: 0 2px 6px rgba(0, 0, 0, 0.3);
}

#search-place {
    background-color: #fff;
    font-family: Roboto;
    font-size: 15px;
    font-weight: 300;
    margin-left: 12px;
    padding: 0 11px 0 13px;
    text-overflow: ellipsis;
    width: 200px;
}

#search-place:focus {
    border-color: #4d90fe;
}

#type-selector {
    color: #fff;
    background-color: #4d90fe;
    padding: 5px 11px 0px 11px;
}

#type-selector label {
    font-size: 13px;
    font-weight: 300;
}
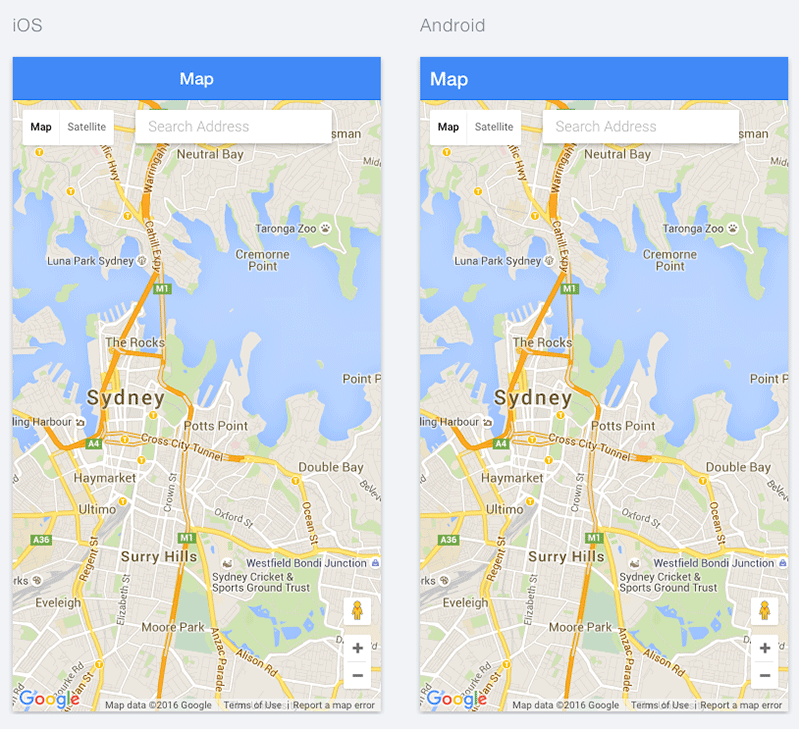
Test It
At this point, you should be able to preview the app in your browser by running ionic server -lab. If the view is rending correctly and we are integrated with the Google Places API, you should see a map and search box:
Setup the Compass
Our final step is to create the compass view, which will show us all the navigation details. We are going to include the following details:
- Distance to destination (in meters)
- Bearing to destination (in degrees)
- Current heading
- Different between current heading and destination bearing (in degrees)
- Render a compass arrow based on the difference between the current heading and the destination bearing
Add Route
Open the app.js file and add a route for your compass:
  .state('compass', {
    url: '/compass',
    templateUrl: 'compass.html',
    controller: 'compassCtrl'
  });
Create View
Create a new file compass.html and add the following:
<ion-view view-title="Compass">

  <ion-content>

    <div class="list" id="results">
      <div class="item item-divider">
        Location Details
      </div>

      <div class="item">
        Distance to destination
        <span class="item-note">
          {{ distance }} meters
        </span>
      </div>

      <div class="item">
        Bearing to destination
        <span class="item-note">
          {{ bearing }} degrees
        </span>
      </div>

      <div class="item">
        Current heading
        <span class="item-note">
          {{heading}}
        </span>
      </div>

      <div class="item">
        Difference in heading and bearing:
        <span class="item-note">
          {{difference}} degrees
        </span>
      </div>

    </div>

    <div class="card">
      <div class="item item-divider">
        Compass
      </div>
      <div class="item item-text-wrap arrow-container">
        <div id="arrow" style="{{ animateRotation }}"></div>
      </div>
    </div>

  </ion-content>

</ion-view>
Update index.html
We are going to include a library by Chris Veness to help manipulate the coordinates. Add this file and include it inside your index.html:
<script type="text/javascript" src="js/latlon.js"></script>
Create Controller
With a view created, we must setup the controller which will look something like this gist.
Conclusion
At this point, you should be able to search for an address on your phone. Once a valid destination is found, you can tap the compass icon in the top right corner and watch the data update in real-time.
As we mentioned in the beginning, this is part one of our two part series. We will be posting a follow up in the coming weeks that outlines the Watch functionality.
If you'd like to view the entire code it is available on our GitHub. As always, comments are welcomed - please let us know if you found this helpful or have any questions!